I had to create a Japanese ship for the beginning scene. The shot is only from a first person perspective so I don't need to create a whole ship. I only needed to create the flight deck from which the planes will take off from.
The first step was to create the deck itself. I did this by creating a shallow box. I used the connect tool to separate the box into 3 sections. Here I could shrink each section to create a bowed front.
I added a decking material to the shape. I wanted a grey, slightly shiny surface so once I uploaded the material I modified it using the spectular level and glossiness.
The material layed incorrectly on the bowed part of the shape. I had to use a UVW map to change the material to a plane layout.
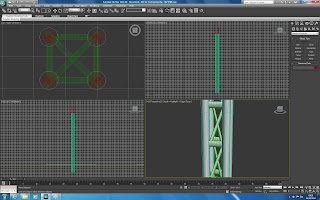
I then had to create a couple of frequency towers. These were used to relay messages to the flight deck from the control room.
I made these using a series of cylinders. I made four into a square shape. Then I connected them using horizontal cylinders. The final step was to link them with cylinders angled at 45 degrees.
I grouped this shape and copied it so I could place a tower either side of the deck.
The next stage was to add the labels on to the decking. To do this I created a plane and added the appropriate material to it. I made sure the image was the correct size by using the bitmap fit option in the UVW map. This made sure the Japanese image was the correct size.
I then added flight guides to the deck using the same method but I used a plain white material. I elongated the shape to form the guides.
I aligned the shapes with the decking but the image was conflicting with the decking material. Therefore I has to raise the plane up the slighest amount so the image was visible.
This created the deck.
The animation will use it from a first person perspective so it was important it looked good from ground level.
I am pleased with the model and am looking forward to it being in place in the scene with the correct lighting and environment.


No comments:
Post a Comment