Now that all the majority of the scenes were in place and sounds are added through Premiere all we had to do was tweak the animation to make sure it played smoothly and correctly in a cognitive process.
We did have some extra scenes that Dimitar was assigned to animate but unfortunately he ran out of time to render them. Therefore we have no explosion/smoking scene within the video. I really think this would of added another level to the work as we do not have that many action scenes. Next time we would have make sure each team member is on track as well as ourselves.
Overall I think Virtual Environments has been a great module. I have learnt all I set out to learn and more and produced an animation that I am proud of as a group and as an individual. Looking back I would of liked to add more reactor techniques into the work, like fire or smoke, and perhaps some extra characters. Also working in the group became quite challenging at some points because of the lack of input from other team members. But I really felt this time has improved my 3DS Max skill set and I look forward to expanding it in the future.
Monday, 10 December 2012
Adding the Car Sweep scene
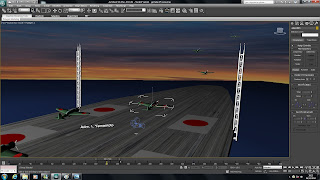
To introduce the harbour to the animation we decided, when drawing the storybaord, to have a shot of a jeep moving across the harbour with the camera following it. It then will turn upwards and capture a shot of the harbour that the USS Arizona is stationed at.
To do this I imported the finished harbour and a jeep. The first task was to make the wheels of the jeep rotate. I did this by ungrouping the jeep and selecting the wheels. I then could rotate them 180 degrees. Using the curve sheet I could loop the animation so the sheels turned endlessly.

The next stage was to make the jeep move. I could of used a path constraint but instead I used the set key. I found afterwards that it would of been much easier to use the path constraint but never mind!

I then added a camera that I made move at the same pace of the jeep. As the jeep ended its drive across the harbour, I made the camera pan round to have a wide angle shot of the whole environment.


When rendered out I could see that when the jeep turned a corner it was not quite right but by that stage in the animating process I did not have time to re-render.
Saturday, 8 December 2012
Skills Learnt
Throughout the Virtual Environment module I have learnt a lot about modelling and animation in 3DS Max. I has given me the chance to broaden my skills and face new challenges.
I have achieved the target of learning how to use the loft tool to create a shape. I did this in the battleship model. It produced a quick, effective shape that would of taken a lot longer to create using other methods. It was very accurate too.

I also wanted to learn how to model using reference planes. I did this when creating the hands for the 3 characters. I helped me make an accurate and realistic model of a hand that I was proud of.
The hand was the greatest challenge for me in this project. It proved to have a more complicated way of animating than I thought, but I managed to learn a new skill of attaching the hand and arms to a biped using the skin modifier. It gave a great effect and I was very relieved when it worked correctly!

I also learnt new skills along the way.
One of them being how to using a link parameter. I managed to make the character pick up an object at a certain point through the animation and move it with him. It was a little difficult to get to grips with at first but once I knew to connect it to the world at the first keyframe I was away.

Another skill I leant was how to create a chrome material. I looks great in renders and reflects the environment within it. I used it on the typewriter mostly but I thought it wa a great technique and I would would it again.
I also learnt how to create a realistic sea. Using the noise map and other tools I was able to produce a sea that was realistic. The only problem was that when rendered it moved way too fast and looked like it was moving through time! I really would of liked to change it to make it look more real but the time frame in which we had did not give me a chance to do so.
The other skill I loved learning was how to use mental ray lighting. It seemed to make the scene so much more realistic. The scene/model I am most proud of is the boat corridor. It uses the daylight system and a mental ray light portal to produce what I think is a very realistic corridor.

Overall I can proudly say I have learnt what I set out to learn and much more. I intend to carry this knowledge into future projects.
Thursday, 6 December 2012
Adding sound
Sound is what will make the animation complete.
As a team we decided what background soundtrack we wanted to play along with the animation. We all really liked Hans Zimmer's 'Time'. It is a musical piece with no lyrics so it doesn't need to coincide with the date of the animation necessarily.
As well as this we wanted some sound effects to match some of the scenes.
We added:
Takeoff sounds for the Japanese takeoff
Sonar and klaxon sound at the control room
Heartbeat at the running corridor
Eva got these sounds from the web.
I really think they make the animation come alive and makes it even more emotive.
Placing the sounds in Premiere was very easy. We could accurately place them at the right moment, eg the klaxon at the point where the captain looks around in panic.
Putting the files into Premiere Pro
Once the majority of the scenes were rendered we tried to start to collect them into one file. The premiere file had to be the correct ratio 720p 30 fps.
We then were able to import the rendered targa images as numbered stills. Premiere automatically made them into a video. From then we arranged them into the correct positions with reference to the storyboard. The storyboard was key for us as it made the editing much easier.
The make the animation flow easier we added a crossfade transition effect with linked the scenes well. We used other effects such as dip to white or black to emphasise the work.
The FDR scenes needed to be in black and white to show its separation from the rest of the work. We used the colour effect and also the noise effect. This produced grain on the video to make it look aged. I really like the effect and I think it actually improved the images as the noise effect blurs the image slightly making it less easy to notice any mistakes. (Not that we have any!)
Wednesday, 5 December 2012
Creating the bomb detach scene
To connect the running scene with the arms falling bomb scene I needed to animate the bomb detaching from the Japanese plane. This would make the animation flow better as make it more realistic.
To do this I merged the environment with the wave of planes from the arms/bomb shot. I ungrouped the Bomber planes bomb from itself so It was a stand alone object. Now I could add motion to it to fall.

To make it fall I used the set key to accurately map it's position in the x, y and z axis. At each keyframe I could change the rotational position and the relative position to the environment. Over 200 frames I moved the bomb from underneath the plane to facing downwards towards the harbour. On the way down I added some rotation to make the bomb appear ad if it was spinning.

I added a camera to the scene to follow the bomb. I could of used a target camera but it would of spun with the bomb which I did not want. Therefore I used a free camera and the set key to position.
I made the camera so it positioned itself just behind the bomb so it showed a sort of third person perspective.

I really like the finished shot, it flows well and links the shots either side if it smoothly.
Creating the bomb falling and arms
The climax of the captains run ends as he looks up and sees the Japanese bomb falling towards the USS Arizona.
To animate all I had to do was use the set key to move the bomb towards the camera. This way I had more control on how fast the bomb appears to fall.

Once I had it at the right speed I could animate the arms. Once again using the ALT X freeze method I could make the arms move into the cameras view. I made sure the hands and fingers moved slightly to make it seem more realistic otherwise the arms would just slide up very robotically.
I had a little trouble animating the hands as I tried to rotate them and they went through the sleeves. It was hard to see due to the opaque view using ALT X. This means I had to move the hands into a better position on each keyframe they went through.

I rendered using mental ray and it looks just how I needed it to.
Tuesday, 4 December 2012
Creating the run to the outside
At the end of the control room scene the commander turns left as if to run somewhere. The next shot is of him running down the ships corridor to the outside to get a better view of the situation.
To create the scene I had to model a inner ship corridor. I researched what they looked like and found they use turn handle blast doors for safety if the boat sinks. Therefore I will model them within the corridor along with the biped.

The biped will "run" through the corridor to the open door at the end, push it open and look outside.
To create the corridor I created a long cuboid and use the shell modifier. This created a walled room. I modelled the doors using a chamfered box. Once I had the shape I used the Boolean tool to make a doorway. This way the doorway and the door were the exactly the same size.
I create the handle by placing a cylinder in the centre of the door and extruding the end polygons. I created a simple torus shape for the actual handle bars. The next step was to place the captains hands inside.

Once that was all correct I merged the corridor and biped with the harbour environment. The daylight system produced a good lighting effect at the door opening but it was way too dark inside.

To fix this I placed a mental ray portal light in the roof of the corridor. This produced a a more realistic and useful lighting effect.

Using the ALT X method once again I animated the biped to move towards the door and open it. I then made the character put his hands on the side bar of the ship and look up.


When animating the camera I wanted to make a lifelike running effect so using the set key I moved the camera along but up and down at the same time.
At the end of the scene he looks up and sees the waves of Japanese planes fly over. I wanted the camera to focus on one wave at a time so using the cameras set key I moved it so he followed the first wave and then the second.

I rendered the scene in different places to make sure it looked ok. At one point the hands skeleton was showing so I hid the bones using the hide tool.
Mental ray portal and daylight system make the scenes seem so more realistic and in the future I intend to use it in all the scenes I make.
Monday, 3 December 2012
Creating the control room scene
For when the attack commences the control room and environment map had to be merged with the captains hands. As stated before scaling the biped and arms causes problems so the other components had to be scaled up.

I deleted the top of the USS Arizona ship where the control bridge was and replaced it with the control room. I then could place the biped in the correct position to animate.
I used the storyboard to gain an insight into how the captain would react and how he should move. I wanted the audience to see the harbour so I made him "look" around as we'll as at his console.


Using the ALT X method again I could animate the hands to make them look real. I made sure it looked like he was using his terminal.
When the sirens blare alerting the personnel of the attack the camera (acting as eyes) look around frantically as if surprised.
I made him look out the window where planes are flying towards the harbour. I liked creating that shot as I think it gives a great effect of realism and tries to create emotion in the motion of the animation.

The captain then turns to the left and runs.

When creating the scene I had problems scaling the daylight system so I had to reimport it from the original file. I had to tweak it slightly in the options rollout to make it work with the new environment.
I really like the scene and shot and look forward to seeing it finally rendered.
Animating the Japanese takeoff scene
The beginning of the work shows the Japanese taking off from their ship. It shows the Japanese commander looking at his watch and saluting the pilots as they takeoff.
To animate I used the same ALT X freeze technique to move the biped. I placed and scaled the ship to the size of the biped as shrinking the biped caused problems as the arms resized incorrectly.

To create the environment I created the sea using an online tutorial and placed all the components inside a large cylinder. I then placed a sky material on to the cylinder and used a UVW map to make sure it looked realistic.

Using the auto key I managed to animate the arms and hands to look at the watch and salut the pilots. This was relitively easy. But in the final render I will have to hide the skeleton as it came through the skin.

I then merged the planes made by Eva into the scene, scaling appropriately. Dimitar animated the propellers to rotate continuously using the dope sheet. We looked at using a motion blur as well to give a more realistic effect.
I made the planes take off but animating them using the set key as this gives greater detail in how the plane moves in each axis.
By timing the planes and the saluting correctly it makes the scene flow easier and tells the story to the audience easier.

I added a light to make out there is a control tower behind the commander. This tries to extend the scene without actually having it physically to show.
I am very pleased with the resulting animation and it flows well.
To animate I used the same ALT X freeze technique to move the biped. I placed and scaled the ship to the size of the biped as shrinking the biped caused problems as the arms resized incorrectly.

To create the environment I created the sea using an online tutorial and placed all the components inside a large cylinder. I then placed a sky material on to the cylinder and used a UVW map to make sure it looked realistic.

Using the auto key I managed to animate the arms and hands to look at the watch and salut the pilots. This was relitively easy. But in the final render I will have to hide the skeleton as it came through the skin.

I then merged the planes made by Eva into the scene, scaling appropriately. Dimitar animated the propellers to rotate continuously using the dope sheet. We looked at using a motion blur as well to give a more realistic effect.

I made the planes take off but animating them using the set key as this gives greater detail in how the plane moves in each axis.
By timing the planes and the saluting correctly it makes the scene flow easier and tells the story to the audience easier.

I added a light to make out there is a control tower behind the commander. This tries to extend the scene without actually having it physically to show.
I am very pleased with the resulting animation and it flows well.
Animating FDR scene
For the conspiracy of the Pearl Harbour animation we decided to make the president choose not to notify the USS about the upcoming attack.
The animation of the scene shows FDR finding the bomb plot document coming through his typewriter. He will pick it up, look at it, and then pick the phone up too. After he has done this he compares the document and phone and puts the phone down. This will highlight the decision to not tell the US about the attack.
To animate I render a scene with a view of the phone and one of the typewriter.
I use the auto key to move the paper up the typewriter at about 60 frames. I had to precisely place the paper in the machine so it flows out realistically. I use a sweeping free camera to make the shot more interesting.


To animate the pickup of the of document I had to select the arms and hands and use Alt X to make it opaque. I then freeze the selection. I can now move the biped with the use of the auto key to animate the character. Here I can move the fingers over a few key frames to make it look like the hands are moving.

To make FDR pickup the paper and phone I had to use a link parameter. This was used through the motion tab and under the parameter rollout.
I had to select the object (paper or phone) at link to world at key frame 1. At the keyframe where I want the character to pick up object I animate the hands to the correct position for pickup and select the paper/phone and add a link by then selecting the hands. From here the object does and goes wherever the hand goes. I did this for the document and phone.
This new technique really helped me make the animation what I needed it to be. I am really pleased I learnt it. It was easy to use at makes the scene more effective.
I added a spotlight to make the scene look more sinister and striking.
I am very pleased with the result and have learnt a lot from making this scene.
Wednesday, 21 November 2012
Animation the blooded hand scene
As we had all the relevant components for the scene we decided to animate the end blooded hand scene first.
The first thing was to merge the environment with biped. I had to scale up the environment as it was too small. I tried to decrease the size of the biped and hands but it started to mess up and deform.
I added the telephone and typewriter to the desk as well.
I first of all added a camera to the head position of the biped. I could then move the camera and not need to move the biped as it was difficult to move unless I am used the footstep tools.
 I animated the camera to make it look how we wanted. I had one viewport as camera one so I could keep track of how the animation looks. I moved the camera to move forward and focus on the document and then step back to look at the hands.
 For the end of the scene I had to animate the movement of the hands. I used the autokey and moved the arms and hands up into position. To make it more life-like I moved the fingers very slightly to make them seem real.

Playing the scene back I was very pleased but it moved too fast. I extended the timeline to 400 frames and moved the key frames by 4 times the amount.
This was much better and was much more realistic.
The first thing was to merge the environment with biped. I had to scale up the environment as it was too small. I tried to decrease the size of the biped and hands but it started to mess up and deform.
I added the telephone and typewriter to the desk as well.
I first of all added a camera to the head position of the biped. I could then move the camera and not need to move the biped as it was difficult to move unless I am used the footstep tools.


Playing the scene back I was very pleased but it moved too fast. I extended the timeline to 400 frames and moved the key frames by 4 times the amount.
This was much better and was much more realistic.
Wednesday, 14 November 2012
Creating the hands
I knew the hands in the animation will be one of the most challenging parts of the modelling and animation. But I wanted to attempt it because I wanted to broaden my skills from simpler objects and this would have to be the most realistic and complex I think I have attempted to date.
Modelling the Hand
I followed a step by step online tutorial, this helped me learn new tools and skills. These included:
It allowed me to start with a box and, using reference planes, shape the box into a hand. The reference planes helped me guide the model to the correct size and depth.
I always used vertices to mould the hand as they gave the most freedom and accuracy. I started with the palm, working my way to thumb. After this I extruded the fingers by capping them and extruding them each.
I drew added geometry to the fingers and the hands by using the cut tool. This new geometry could be moulded to add more detail to the model.
Once I was happy with the shape I added a skin colour to make it realistic and easier to visualise the final outcome.
Making the Sleeve
The sleeves were made by using cylinders that were made more realistic by using soft selection and moving the edges and vertices.
I then inset the end polygon and extruded it out, inset again, then extruded inwards to make the inner sleeve of the arm.
I then placed the hand in the correct position to form an almost finished arm. I did not make them a group beacuse now the hand would be able to move separately.
I added a relevant material to to the sleeve.
Making them move
To make the hands move and animate I had to rig them to a biped. I have not had much experience working with bipeds so I was very cautious and saved my work more often than usual!
I placed the arm (hand and sleeve) at shoulder height of the biped. In figure mode I moved the arms of the biped so its arms were out wide. I then placed the bones inside the arm as best I could, moving the finger, hand and arm bones by using rotation, scale and move tools.
Once I was happy I added a a skin modifier separately to each sleeve and hand. I then had to add the relevant bones to each component. I had to make sure all the left hand bones were in the left hand and right bones in the right arm. This then made the model link with the movements on the biped and made it come alive!
Now I could move the biped and the arms and hands would do the same. When rendering I could hide the skeleton to conceal any sticking out bones.
Making the other characters
The animation consists of three peoples perspectives. For each of them I added a different material to the sleeves and a watch to the japanese character.
I really enjoyed creating the models but I found the animation and rigging more challenging. I wouldn't mind trying it again but I am pleased with the result of the arms I have now.
Modelling the Hand
I followed a step by step online tutorial, this helped me learn new tools and skills. These included:
- The cut tool to add geometry
- The cap tool to add an end to a hole
- How to link a biped to selected body models
It allowed me to start with a box and, using reference planes, shape the box into a hand. The reference planes helped me guide the model to the correct size and depth.
I always used vertices to mould the hand as they gave the most freedom and accuracy. I started with the palm, working my way to thumb. After this I extruded the fingers by capping them and extruding them each.
I drew added geometry to the fingers and the hands by using the cut tool. This new geometry could be moulded to add more detail to the model.
Once I was happy with the shape I added a skin colour to make it realistic and easier to visualise the final outcome.
Making the Sleeve
The sleeves were made by using cylinders that were made more realistic by using soft selection and moving the edges and vertices.
I then inset the end polygon and extruded it out, inset again, then extruded inwards to make the inner sleeve of the arm.
I then placed the hand in the correct position to form an almost finished arm. I did not make them a group beacuse now the hand would be able to move separately.
I added a relevant material to to the sleeve.
Making them move
To make the hands move and animate I had to rig them to a biped. I have not had much experience working with bipeds so I was very cautious and saved my work more often than usual!
I placed the arm (hand and sleeve) at shoulder height of the biped. In figure mode I moved the arms of the biped so its arms were out wide. I then placed the bones inside the arm as best I could, moving the finger, hand and arm bones by using rotation, scale and move tools.
Once I was happy I added a a skin modifier separately to each sleeve and hand. I then had to add the relevant bones to each component. I had to make sure all the left hand bones were in the left hand and right bones in the right arm. This then made the model link with the movements on the biped and made it come alive!
Now I could move the biped and the arms and hands would do the same. When rendering I could hide the skeleton to conceal any sticking out bones.
Making the other characters
The animation consists of three peoples perspectives. For each of them I added a different material to the sleeves and a watch to the japanese character.
I really enjoyed creating the models but I found the animation and rigging more challenging. I wouldn't mind trying it again but I am pleased with the result of the arms I have now.
Friday, 9 November 2012
Modelling the typewriter
To model the typewriter I had to start with making the accurate shape of it. I made a box and coverted it into an editable poly. I then was able to move the edges and polygons to get the appropriate shape.
I used the chamfer tool to round the edges and the boolean tool to indent the top of the typewriter where the mechanism is visible. To boolean, I shaped a box into the correct shape and placed it centrally in the top. I inserted it half way into the typewriter. Then used compound shapes > boolean and picking the shape as operand B, it made the hole.

I then made the base of the typewriter by using another box and moulding to the correct size and shape. I used the connect and extrude tool to create a space bar.

I next made the roller and the back board.
I made the roller by creating a editable cylinder and insetting the top and bottom. I then extruded and scaled them to make the handles.
The back board was simply a chamfered box with slight extrusion at the bottom to mark the ruler.

I then wanted to make a metal hook which it evident on the photograph of the Royal typewriter I am basing the model on. To make it I made a thin box, extruded it in several places and moved parts up accordingly. I then added a turbo smooth modifier.

Placing all these elements together I had the made the main body of the typewriter.
(As the animation will not show the typewriter from behind I did not worry about joining the roller to the base).

I then made the shown mechanism by simply flattenig a cone and placing it inside. I then made a small clip to hold it in by extruding from a box to make a elongated H shape.


I then placed them into the model where appropriate.
The next step were the letter keys. To make them I made a short cylinder, inset it and extruded inwards to create a button shape. I then added a long thin box as the key stick.
I could then add text to the button using the text tool, the same way I modelling the telephone.

I then shifted and dragged to create the entire keyboard. I had to change every letter on each key to correspond with the letters on the photograph of the typewriter.
I enlarged the shift keys as they are bigger and added 'SHIFT' to them instead of letters.

By slipping the keys into place I had successfully made the typewriter.

To make it more realistic I wanted to material. I gave the main body, roller and back board a dark grey colour.
I also wanted to give the hook, keys and highlights of the typewriter chrome elements. I thought this would make it look more impressive and realistic.
By using an online tutorial I made this by adding a raytrace element in the reflection material map. I then applied the material to the appropriate parts of the model.
The finished typewriter:

I am pleased with the result and am glad I have now learnt to use a chrome material.
Creating the typewriter
For the animation we need a form of communication that tells FDR about the attack on Pearl Harbor. It needs to be a visual representation so the audience can see what is going on. This means that a piece of paper should be recieved with the details on.
In the 1940s people people still commonly used telegrams. This was usually in the form of morse code. But wealthier people could hook up a typewriter or other device and recieve a physical message on paper.
This is what I am going to create as it was the most likely way of communication for messages such as these without face to face talking.
 I am going to model this typewriter that is from the 1940s. It is a Royal typewriter made in New York. In the 1940s it would have been top of the range and therefore perfect for a president.
In the 1940s people people still commonly used telegrams. This was usually in the form of morse code. But wealthier people could hook up a typewriter or other device and recieve a physical message on paper.
This is what I am going to create as it was the most likely way of communication for messages such as these without face to face talking.

Subscribe to:
Comments (Atom)